Glitter Alphabet Bag

What you will need:
- Plain cotton tote bag
- Scissors
- Iron on glitter
- Fabric paint - in a colour of your choice
- Masking tape
- Iron
- Spare piece fabric
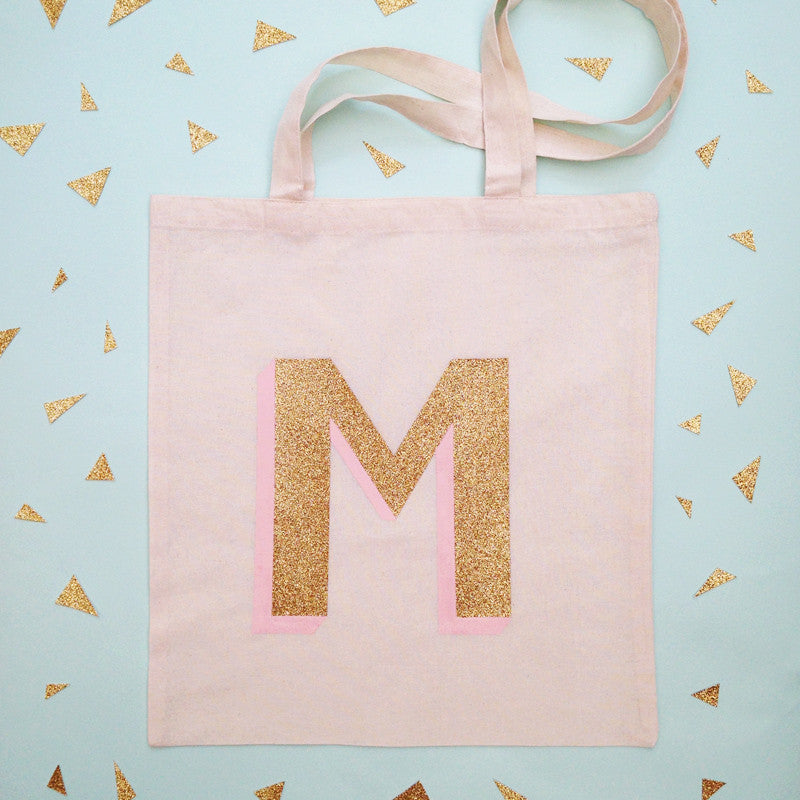
Start by cutting out the iron on glitter to the letter of your choice. My letter 'M' was fairly straight forward to cut out but for a more difficult shape such as an 'S' or 'O' you may want to print out a letter to use as a template to cut around.

Position the glitter on to your tote bag shiny side up. You will notice there is a a layer of protective film on it which you will peel off once you have ironed it in place. Put a scrap piece of fabric on top to protect your iron, and then iron on a hard surface on the hottest setting using a medium pressure for about 10-15 seconds. Check it is fully adhered and if it seems loose at all then iron for a little longer.
Once you are sure the glitter has stuck to your bag you can carefully peel off the protective layer from the glitter.

To give the bag a bit more depth I've decided to create a 3D look to the letter M by adding a shadow in pale pink. Using masking tape as a guide you can mark out the area you wish to paint. Paint your masked out area and once dry you can peel of the tape to reveal your finished letter. Iron on reverse to set the fabric paint.
And there you go...it really is as simple as that. Now sit back and enjoy the sparkles on your new alphabet tote bag.

0 comments